
When I built my first outdoor kitchen 12 years ago, I spent way too much money and time on features I rarely used. Since then, I’ve helped dozens of homeowners create functional outdoor cooking spaces that don’t break the bank or require professional installation.
Today, I’m sharing my proven approach to building a simple but highly functional outdoor kitchen that you can complete in a single weekend for under $1,000. This design focuses on the essentials while leaving room for future upgrades as your needs and budget evolve.
What You’ll Need
Tools:
- Drill/driver
- Circular saw
- Level
- Tape measure
- Pencil
- Adjustable wrench
- Stud finder (if attaching to house)
Materials:
- Pressure-treated 2×4 lumber (quantity depends on design)
- Weather-resistant plywood or cement board
- Weather-resistant countertop material (concrete board, tile, or sealed wood)
- Exterior screws
- Concrete blocks or pavers (for base)
- Weather-resistant finish (paint or stain)
- Optional: weatherproof outdoor cabinets or shelving
Appliances:
- Your existing grill (or new one if needed)
- Optional: small refrigerator rated for outdoor use
Step 1: Plan Your Layout
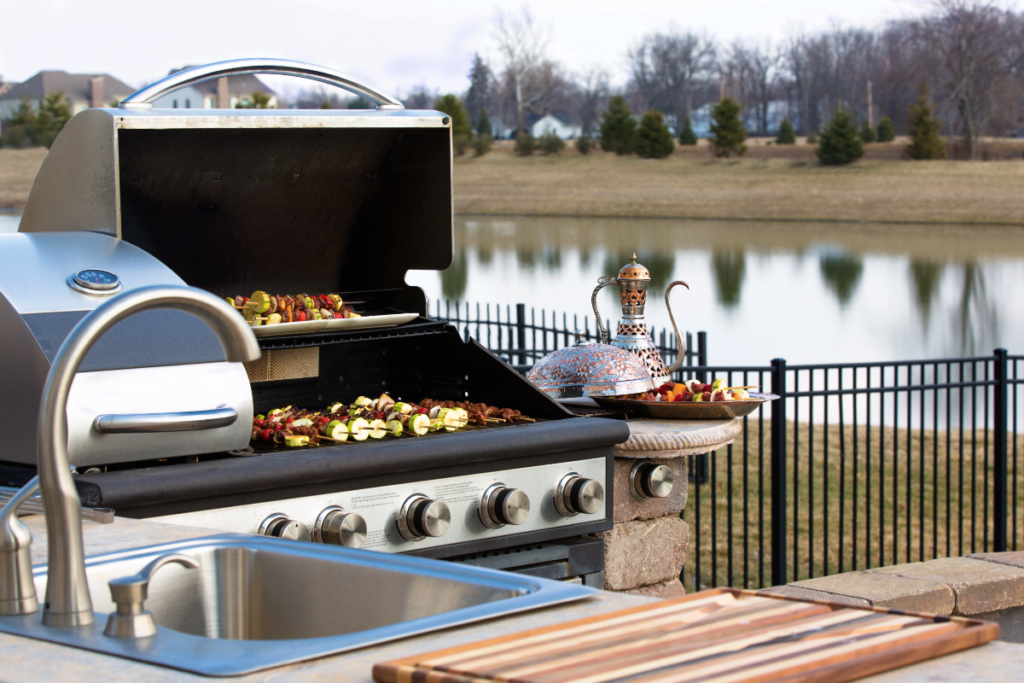
The most efficient outdoor kitchen follows what I call the “cooking triangle” principle – with zones for prep, cooking, and serving. For a basic setup, you need:
- Prep Area: 24-30 inches of counter space, ideally to the left of your grill
- Cooking Area: Space for your grill and any additional cooking appliances
- Serving Area: 18-24 inches of counter space to the right of your grill
Sketch your design on paper first, considering:
- Proximity to your home’s doors
- Wind direction (you don’t want smoke blowing into your house)
- Views (both what you’ll see while cooking and how the kitchen looks from other areas)
- Existing utility connections if applicable
For a budget build, I recommend an L-shaped design with your grill as the focal point. This maximizes functionality while minimizing materials.
Step 2: Prepare the Foundation
Your outdoor kitchen needs a stable, level base. Options include:
- Existing patio or deck: If your structure is sound, you can build directly on it (just ensure it can handle the additional weight)
- Paver base: Create a level surface using landscape pavers (the most budget-friendly option)
- Concrete slab: More expensive but provides the most stable foundation
For a weekend project on a budget, I recommend using your existing deck or patio, or creating a simple paver base.
To create a paver base:
- Mark your kitchen footprint
- Remove any grass or vegetation
- Add 2-3 inches of compacted gravel
- Add 1 inch of sand, leveled
- Lay pavers in your desired pattern
- Fill gaps with polymeric sand
Step 3: Build the Frame
For the basic structure, we’ll create a simple wood frame:
- Cut pressure-treated 2x4s to create the outline of your countertop areas
- Create a box frame for each section (typically 36″ high x 24″ deep)
- Add cross supports every 16 inches
- Ensure everything is square and level
- If attaching to a wall, use lag bolts to secure the frame to studs
Pro tip: Create your frame about 1.5 inches shorter than your desired final counter height to account for the countertop material.
Step 4: Add the External Sheathing
Next, cover the frame with weather-resistant material:
- Cut cement board or pressure-treated plywood to size
- Attach to the frame using exterior-grade screws
- Leave openings for any appliances or storage areas
Step 5: Install Your Countertop
For an economical yet durable countertop, I recommend one of these options:
Tiled Concrete Board:
- Attach concrete backer board to the frame
- Apply outdoor-rated ceramic tile with waterproof thinset mortar
- Grout with outdoor-rated grout
- Seal thoroughly
Sealed Wood:
- Use 1.5-inch thick cedar, cypress, or redwood
- Sand thoroughly
- Apply multiple coats of marine-grade polyurethane
- Reapply sealer annually
Concrete:
- Build a form on top of your structure
- Mix and pour concrete
- Allow to cure completely
- Seal with concrete sealer
For a weekend project, tiled concrete board offers the best balance of durability, cost, and ease of installation.
Step 6: Integrate Your Grill
Most budget outdoor kitchens are built around an existing standalone grill:
- Measure your grill carefully
- Create an opening in your counter slightly larger than the grill’s dimensions
- Add metal flashing around the opening for heat protection
- Drop in the grill, ensuring it’s secure but removable for maintenance
Safety note: Allow at least 2 inches of clearance on all sides of your grill for heat dissipation. If using a built-in grill, follow manufacturer’s specifications exactly.
Step 7: Add Storage and Accessories
Even a basic outdoor kitchen needs some storage:
Budget options include:
- Open shelving underneath the counter
- Repurposed weather-resistant cabinets
- Hooks for hanging utensils
- Rolling utility cart for additional workspace
I personally love using a combination of open shelving (for items you use frequently) and one weather-resistant cabinet with doors (for things that need protection from the elements).
Step 8: Apply Finishing Touches
Now that the structure is complete:
- Apply exterior paint or stain to all exposed wood
- Add weatherstripping to any cabinet doors
- Install lighting if desired (solar-powered options are perfect for areas without electricity)
- Consider adding a simple roof or pergola for weather protection
Real-World Examples & Variations
The Minimalist ($500-$700)
My client Sarah had a tiny backyard but loved entertaining. We created a simple setup using:
- A rolling grill cart as the base
- Cedar planks attached to create additional counter space
- Wall-mounted tool rack for utensils
- A small side table for prep work
This gave her a functional cooking space that could be partially tucked away when not in use.
The Party Host ($700-$900)
James wanted to focus on serving drinks and preparing simple foods. His setup included:
- Standard grill as the centerpiece
- Extended countertop with space for a portable ice bucket
- Open shelving for storing glasses and serving pieces
- Repurposed outdoor cabinet for storage
- String lights mounted overhead
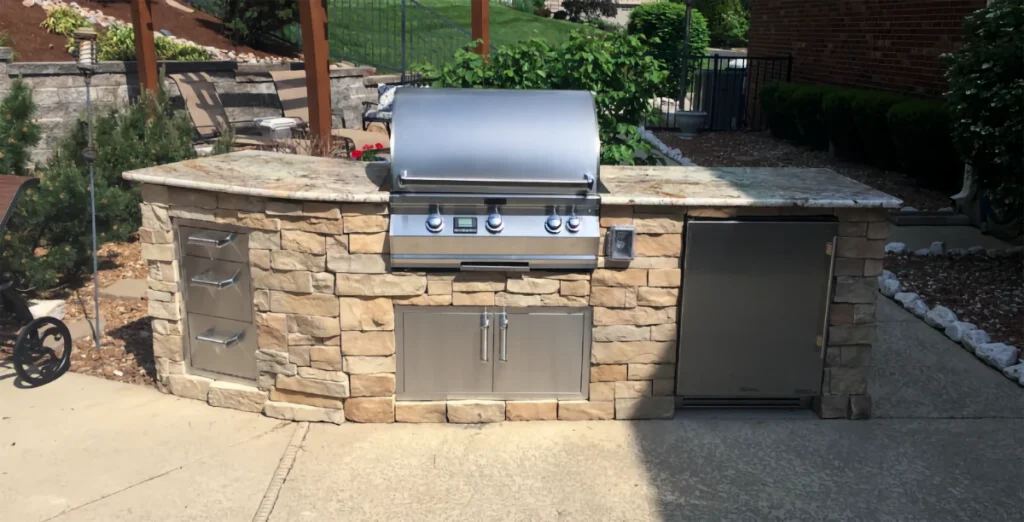
The Serious Cook ($900-$1,000)
Miguel prioritized cooking functionality over aesthetics. We built:
- A frame with space for his existing grill
- Extra-deep countertops for serious food prep
- A side burner salvaged from an old grill
- Custom storage for his collection of cast iron cookware
- Hooks for hanging utensils within easy reach
Maintenance Tips
To keep your budget outdoor kitchen looking good and functioning well:
- Seasonal cleaning: Thoroughly clean all surfaces at the beginning and end of outdoor cooking season
- Cover when not in use: Invest in covers for your grill and countertops
- Reseal annually: Apply fresh sealant to countertops and wood surfaces every year
- Inspect regularly: Check for signs of water damage, loose fasteners, or pest issues
- Address issues promptly: Small problems become big ones if ignored
Future Upgrades
The beauty of this simple design is that it can evolve as your needs and budget change. Consider these future upgrades:
- Water source: Running a water line and adding a simple sink
- Refrigeration: Adding a small outdoor-rated refrigerator
- Lighting: Installing permanent electrical for better lighting
- Roofing: Creating overhead protection from weather
- Specialized cooking: Adding a pizza oven or smoker
I’ve built elaborate outdoor kitchens with all the bells and whistles, but honestly, this simple weekend project design gets used just as much. It focuses on functionality over flash, giving you everything you need to cook and entertain outdoors without the hefty price tag or complicated construction.
Remember, the goal is to create a space where you’ll actually cook and gather with friends and family. A simple setup that you use weekly is far better than an elaborate one that’s too precious or complicated to enjoy regularly.
Have you built an outdoor kitchen on a budget? Share your experience in the comments below. I’d love to see what you’ve created and hear your tips for making the most of outdoor cooking spaces.
Happy building, Jake